Photoshop Tip #2: Creative Dithering
When Photoshop converts a 24 or 32-bit image to indexed color mode, you can specify how you want it to choose colors to replace those that aren't in the target palette. The options are None or Dither.1 Usually, dithering a continuous-tone image creates an unpleasant mess. There are ways to deal with that, but that's not what this tip is about. This tip is about using dithering as a way of generating images.
The secret here is that when Photoshop dithers an image to a black and white, there's a narrow range of pixel luminance values which produces an interesting (and rather trippy) pattern. The steps below show how to produce it.
Note: this tip was written for and tested on Photoshop 4.0.1.
The first step is to create a new blank RGB image. Fill it with 100% black.
![[100% black image]](Tip2-Step1.gif)
If the colors on your tool palette aren't black and white, click the little b/w icon ![]() now. Now add some noise to the image using the Filter/Noise/Add Noise... dialog box. Set the Amount to 220, Distribution to Uniform, and check the Monochromatic box. Then press OK.
now. Now add some noise to the image using the Filter/Noise/Add Noise... dialog box. Set the Amount to 220, Distribution to Uniform, and check the Monochromatic box. Then press OK.
![[noisy image]](Tip2-Step2.gif)
Use Filter/Blur/Gaussian Blur... to soften the noise. A Radius of 8 works well.
![[blurred noise]](Tip2-Step3.gif)
Now convert the image to black and white. The command Image/Mode/Indexed Color... brings up the Indexed Color dialog box. Set the Palette to Uniform, the Color Depth to Other, Colors to 2, and Dither to Diffusion. Press OK.
![[dithered image]](Tip2-Step4.gif)
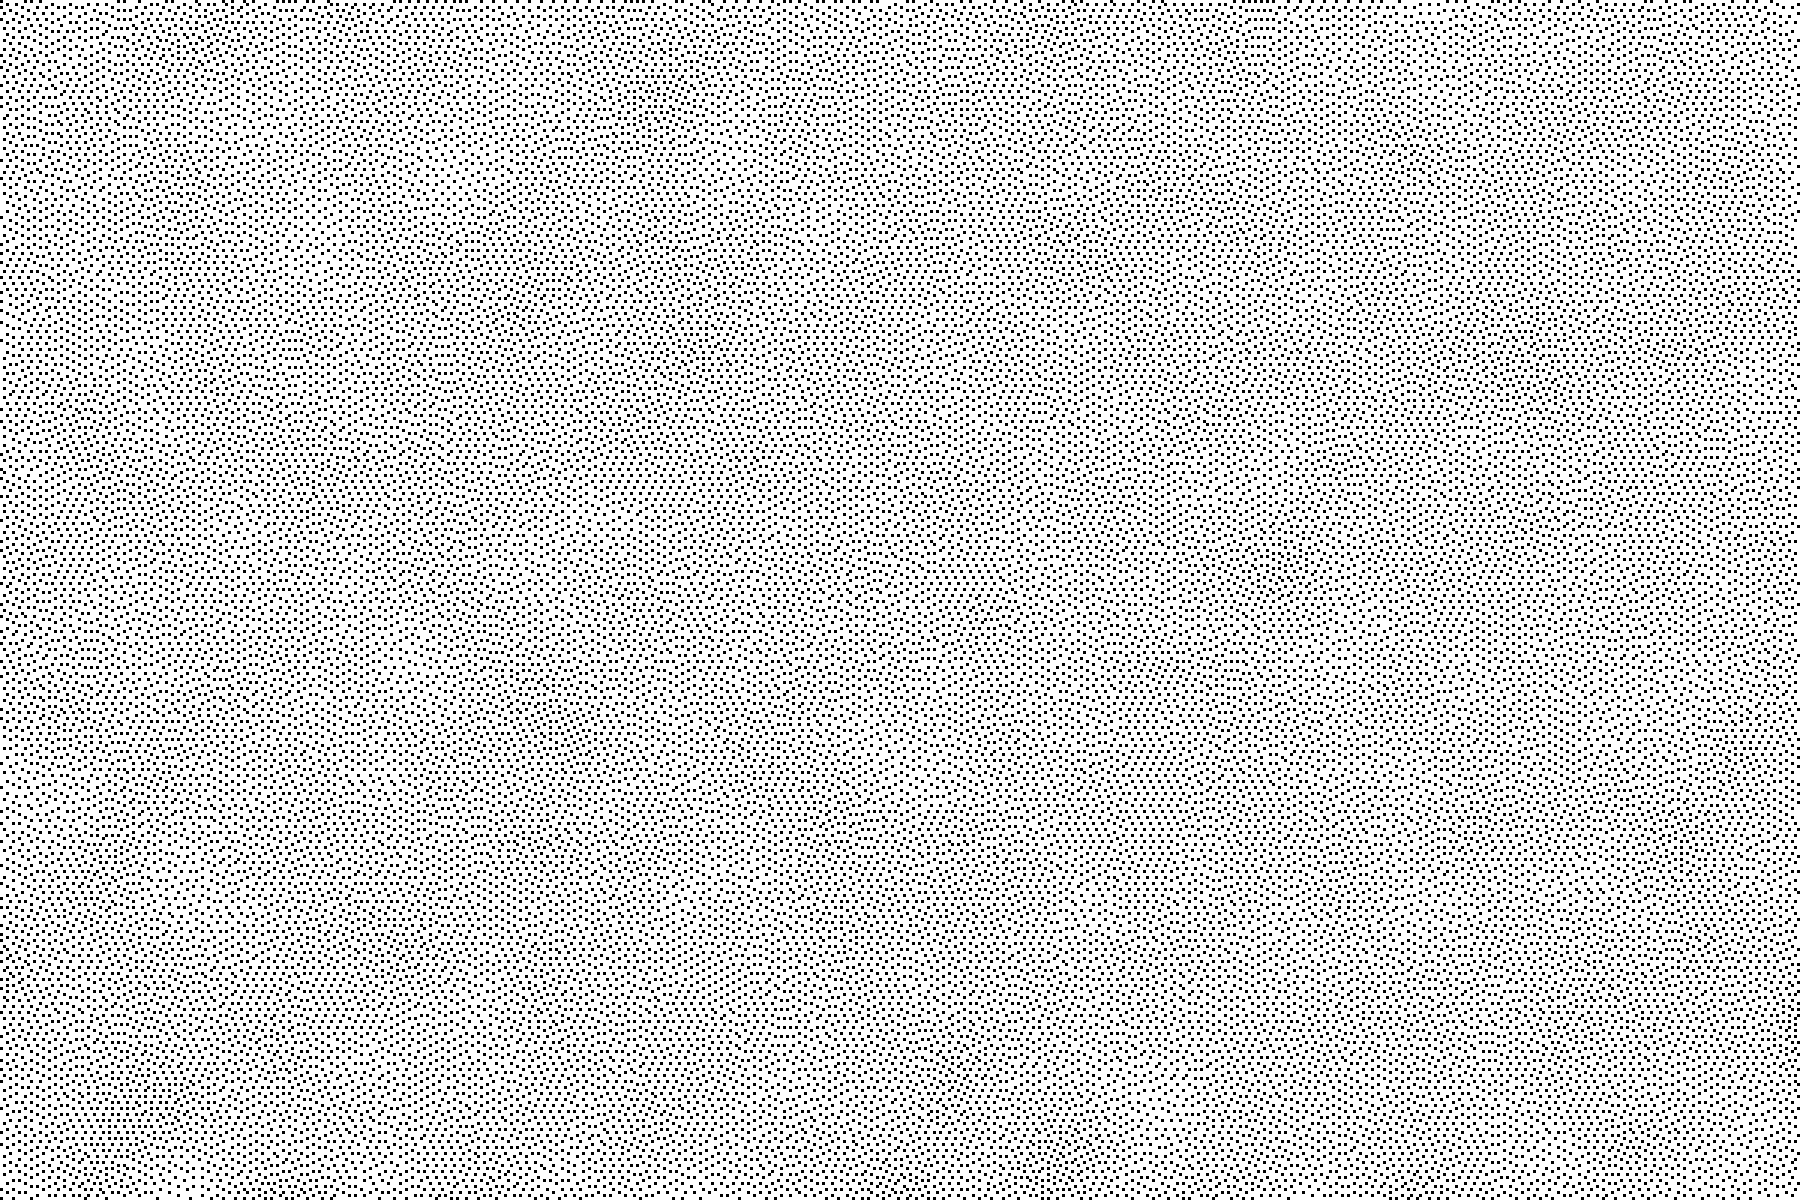
The result will look something like this. It might not seem like much at first, but stare at it for a while. You'll note that as your eye rests on one dot, phantom lines and arcs flicker on the edge of your vision. Try to find them directly and they disappear. This is a good example of how our brains try to find patterns in information, even if none are there. Photoshop created an image that is just on the edge of being interpretable by our minds. The effect is more pronounced when the colors are inverted and the image is magnified, as it is here. Take a good long look at it, or try a larger version (104K GIF).
![[trippy dots]](Tip2-Step5.gif)
Tips
If you want to find the exact shade of gray that produces the dither pattern you desire, create a long thin image and fill it with a black-white gradient, like so.
![[smooth black-white gradient]](Tip2-RawGradient.gif)
Duplicate the image and convert it to black and white as above. This produces a dithered gradient.
![[dithered black-white gradient]](Tip2-DitheredGradient.gif)
Move the cursor over the dithered image to the dither pattern you're trying to duplicate. Note the X value in the Info tab. Switch to the original smooth gradient and move the cursor to the same X value. The grayscale value at that point is the shade of gray you desire.
Using the dithered gradient technique, it's easy to show that the widest pixel spacing is produced by filling an area with a grayscale value of 88%, adding uniform monochromatic noise with an amount of 2 or 3, and then dithering.
Have fun with this. Dithering to black and white is a technique that, like sheep, has many uses.
End notes
1. There's one other option, Pattern, but it's only available when converting to the Macintosh System palette.
Last updated 29 March 2003
http://www.rdrop.com/~half/Creations/Art/Photoshop/Tip2.html
All contents ©2001-2002 Mark L. Irons
Previous: Tip: Layer Masks ··· Next: Tip: Transparent PNGs