A Black And White 2 Strategy Guide
A Semi-Spoileriffic Guide to a Quick Win Through Being (Mostly) Good
Warning: Spoilers Ahead!
0. Summary
Win through impressiveness. Avoid battle with two exceptions: defense, and using your creature to destroy enemy wonders before they’re used against you.
1. Introduction
Some gods are virtuous, some vile. After playing Black & White 2 through several times, I’ve found that I tend to be quite good, but pragmatic. This means winning through impressiveness, eschewing armies, and playing defensively, yet attacking preemptively if doing so makes the game easier. This strategy leads to a quick win; no land takes more than a few hours. Read on if you desire a quick, (mostly) good path to victory. If you tread a different godly path, this guide might yet teach you something.
Keep in mind that this is a strategy guide, not the strategy guide. If you follow it to the letter you'll miss half the fun of the game. Take what you like from what follows, but don’t treat it as the only way to play.
2. The Strategy
The strategy is two-pronged. The first prong is you: your goal is to increase your city’s impressiveness as quickly as possible, thus encouraging other cities to emigrate. The second prong is your creature, whose primary role will be to keep the peace by eliminating threats to your city.
Elaborating a bit more, as a god you will focus on defense, resource management, and city layout, with an emphasis on the latter. Planning and building an impressive city is the key to winning this way, and you’ll spend most of your time in this activity. When your city faces threats (e.g., catapults approaching your walls), your creature will deal with them. Usually your creature will be used defensively, but it will play a critical military role in eliminating long-term threats to your city.
2.1. Offense and Defense
This primarily defensive strategy has one glaring exception: enemy wonders. While the siren wonder is powerless against you (since it affects only armies, which you won’t have), the enemy’s hurricane, earthquake, and volcano wonders can do great damage to your cities. Following the adage “the best defense is a good offense”, it will be your creature’s job to destroy these enemy wonders before they can be used against you. At the beginning of lands with enemy wonders, direct your creature to first break down any gates barring the way to the wonder, then leash your creature to it with the soldier leash. Your creature will soon damage it, which renders it powerless. Since the enemy does not repair buildings, this leaves you free to build without fear of setbacks.
Defense consists of keeping your walls shielded to protect from catapults, and using your creature to take out attacking troops.
The biggest hole in this strategy is enemy creatures. An aggressive enemy creature can be a persistent problem, attacking your city walls or killing immigrants en route. If an enemy creature comes within your influence it can be taken out with a large rock (hold above enemy creature, drop, repeat—the larger the rock, the better), but if it hangs around outside your influence it can be a pain. Try luring it toward your city by opening your the city’s gates.
One side effect of this strategy is that sometimes emigrants from the enemy’s main city will refuse to pass through broken city gates. There’s nothing to be done about this until the land is a won, so don’t count on the resources these people bring with them.
2.2. Building a Great City
To win through impressiveness you must build a great city. The properties of a great city are impressiveness ![]() , production
, production ![]() , happiness
, happiness ![]() , housing capacity
, housing capacity ![]() , and fertility
, and fertility ![]() . Of these, the most important is impressiveness, which will be the focus of the next section. Each of the other properties will be discussed in turn.
. Of these, the most important is impressiveness, which will be the focus of the next section. Each of the other properties will be discussed in turn.
2.2.1  The Anatomy of Impressiveness
Good building practices are critical to converting your enemies through impressiveness, so pay attention!
To see the how impressive your city is, hover your hand over the city center’s scroll for a few seconds:
[img: city stats]A city’s impressiveness is the sum of its base impressiveness, which is determined by which buildings you build and where you build them, and eight* modifiers: your alignment, population, homelessness, town layout, building placement, building variety, security, and trees. In this section I’ll treat each factor individually, and suggest ways to maximize them.
*Actually, there must be at least one other thing that counts toward impressiveness, as the numbers in the above example don't add up nicely. However, the missing modifier(s) seem to be small.
2.2.1.1. Base impressiveness = Building Type + Location
Each building you construct adds to your city’s impressiveness. Each type of building has its own base impressiveness, ranging from measly—villas are only +22—to huge: each wonder is +3,000. To build an impressive city, build impressive buildings like wonders, amphitheatres, temples, baths, etc.
Where you build often affects a building’s impressiveness. Some locations, particularly lowlands, decrease a building’s impressiveness, so avoid building in them. Other areas, especially elevated ones, can give a bonus up to +200. Areas where the location bonus exceeds +100 tend to be small. The more buildings you can build in these areas the greater the total location bonus you’ll receive, so fill these regions with many small buildings rather than a few large buildings. To avoid an unhappiness penalty, construct buildings that can be built close together such as manors and mansions.
2.2.1.2. Alignment
This ranges from −4,000 for pure evil to +4,000 for angelic. To increase this, do good things: satisfy your people’s needs, heal those at less than 100% vitality, and so on.
2.2.1.3. Population
“Population” is a misnomer. This bonus isn’t based on the number of people who live in your city. Instead, it’s simply 1.8 × the adult housing capacity. To increase this bonus, simply build more housing.
2.2.1.4. Homelessness
Homelessness is always a penalty, and never rises above zero. Each adult in excess of the city’s adult housing capacity decreases the city’s impressiveness by −18. This can add up quickly, particularly if you use siren miracles to convert enemy troops. So build lots of housing. Always try to have more than you need.
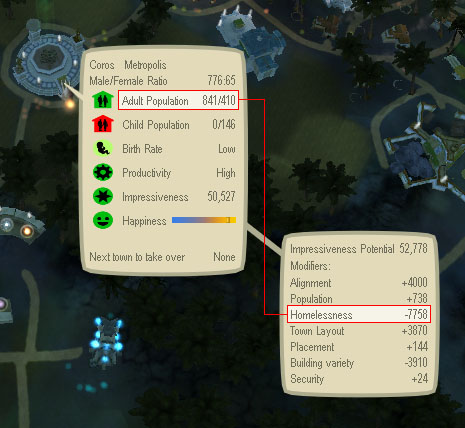
(841 adults − 410 capacity) × −18 = −7758 homelessness penalty, ouch!
Given how the building variety, population, and homelessness modifiers work, I’ve devised a strategy for building villas that tries to maximize these bonuses while using as few resources as possible.
2.2.1.5. Town Layout
This is a straight +45 impressiveness for each building you connect to a road. The bonus can only be earned once per building, and doesn’t go away even if the road doesn’t connect to the rest of your city or the road is destroyed. To increase, connect every building to roads. Connecting an embellishment to a road doesn’t give a bonus.
2.2.1.6. Placement
“Placement” is another misnamed modifier. It’s not about where you put buildings, but whether you’ve changed the direction they face before placing them. Each building whose direction was changed before placement increases the placement modifier by +9.
2.2.1.7. Building Variety and the Two Building Rule
Like homelessness, building variety is always a penalty. It’s another poorly chosen name, as this modifier penalizes lack of building variety. The mechanics are a little complicated:
The first two buildings of the same type (e.g., the first two manors) do not incur a building variety penalty.
From the third building of the same type on, each successive building will incur a greater building variety penalty up to a per-type cap.
A building type’s cap, and how many buildings it takes to reach the cap, varies by building type. The more impressive the building type, the greater the cap and the sooner it’s reached.
Examples are in order. Here’s the building variety penalties, in order, for building five temples: 0, 0, −390, −585, −585. As you can see, the cap is reached at the fourth temple, and it’s −585. For villas, the cap is −18, and isn’t reached until the eighteenth villa is built.
Because of this, I now follow the two building rule: unless absolutely necessary, build no more than two of each civic & production building type. Once you build more than two buildings of the same type, you’re gaining less impressiveness for the resources used than you would have if you’d used those resources to build a building with full impressiveness. Note that this includes altars and creature pens; they’re reasonably cheap, so build two, but not more.
This rule applies to civic & production buildings, not embellishments or housing. Embellishments do not incur a building variety penalty, so build lots of them. Housing is also different, as the building variety penalty is made up for in part by the population modifier. It’s also necessary to build lots of housing to avoid big homelessness penalties.
Discovering the two building rule has cut my typical building variety modifier from around −4,000 to less than −1,000.
2.2.1.8. Security
Building walls around your city increases the security modifier. I don’t know exactly how wall length/position affects the bonus.
2.2.1.9. Trees
Decorative trees are your secret weapon. Each tree planted near a building is +20 impressiveness. While that may not seem like much, you can plant a lot of trees around buildings. If you don’t pack buildings tightly, it’s easy to fit five trees around a villa (for +100 impressiveness) and twenty-five around a large building like a creature pen (+500 impressiveness). With some work you can fit double, triple, or even quadruple these numbers for truly impressive impressiveness bonuses.
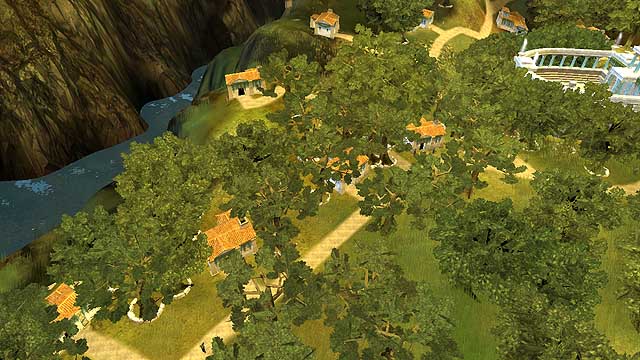
Not seeing the neighborhood for the trees = impressive
Some tree tips:
Decorative trees will not be cut down by your people (though your creature might uproot them), so they’re a reserve stock in case you run low on freestanding trees.
Decorative trees do not drop seedlings, so to obtain new trees you’ll have to maintain some freestanding trees on fertile land.
Buy hand multipickup early to make replanting trees easy.
If your altar is built on fertile ground, don’t plant trees near it. In an emergency it’s frustrating to find your altar’s miracles obscured by foliage.
Trees are free, self-replenishing impressiveness. Use that gift!
2.2.2.  Production
A productive city is a happy city. Each of the three resources (grain, wood, and ore) requires a different strategy for maximum production. Also, building layout can increase production bonuses. Finally, keep all production buildings staffed with an adequate number of disciple refiners.
2.2.2.1. Grain
Grain production takes planning to set up properly, but no work after setup is done. Key facts: (1) fields yield more when placed in fertile areas, and (2) field productivity is increased by nearby granaries, storehouses, universities, and lamps. Of the three buildings, granaries are the best balance of resource cost and space taken up, but they make nearby non-production buildings unhappy. This drawback can be overcome by surrounding a granary on all sides with medium-to-large fields, which act as a buffer. Surround a granary or two with fields, then build storehouses and universities just outside the ring of fields. Distribute lamps liberally throughout the area. Good layout (and lots of disciple refiners) can increase granary output by more than 450%.

Group fields, granaries, and universities for a big production boost
2.2.2.2. Wood
Wood requires no planning, but takes more work to manage. Its advantage is that it is self-replenishing. Key facts: (1) trees drop seedlings only in fertile regions (the green areas shown while the F key is pressed), and (2) they drop seedlings only at the edges of forested regions. To boost forest growth, make a practice of occasionally grabbing a few trees from a well-forested area and replanting them in empty fertile regions. Space them out a few tree diameters to ensure they’ll drop seedlings. To ensure a plentiful wood supply, start replanting as soon as you arrive at a new land.
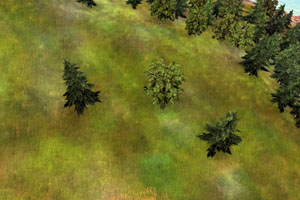
Three well-spaced trees
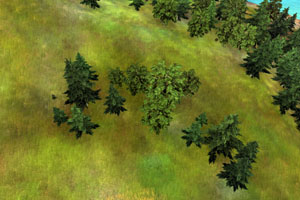
Soon: sixteen trees
When your influence ring expands, it often brings new trees within your reach. If they’re tightly packed, grab a few and redistribute them to encourage growth. Watering trees will speed their growth, but it’s unnecessary if you reforest occasionally.
God-building with trees requires some care. Don’t use the entire tree; leave something to replant. This has three benefits: (1) you get wood for building, (2) you get more wood later when the tree’s regrown (and extra if it’s dropped seedlings), and (3) the good earned by replanting cancels the evil earned by uprooting. The amount of lumber you can squeeze out of a tree varies with its size and species, which you’ll have to learn through experience. However, any mature tree will yield enough to god-build a villa.
This strategy should keep your storehouses full of wood without disciple foresters. You'll be able to postpone buying the lumber mill until land 8.
2.2.2.3. Ore
Ore is the hardest resource of all to obtain, because after land 4 only a finite amount is readily available on each land. Once the mine near your city is exhausted, you must either take over another settlement and work its mine, or wait for immigrants to bring more.
To build your ore store quickly, create some disciple mineworkers, build a smelter next to the mine as soon as possible, and staff it with disciple refiners. If you need to expand your influence to reach the mine, use a storehouse. It’s got a fairly wide influence ring for the amount of materials it requires, and it will make nearby smelters more productive.
When you exhaust the local mine, reassign any disciple refiners still at the smelter. You can use the destruction tool on this now useless building, at the cost of some impressiveness. You have to weigh the loss against potential impressiveness gained by building something else where the smelter was.
2.2.2.4. Production Building Layout
Cluster production buildings (granaries, smelters, lumber mills, storehouses, and fields) to increase their mutual productivity bonuses. Lamps also increase production. Universities give the largest production bonus of all buildings, but placing one adjacent to production buildings will make it quite unhappy. Counter this by planting trees around it until its happiness indicator becomes green (preferably dark green).
2.2.3.  Happiness
Happiness doesn't directly affect your city's impressiveness, but it's easy to achieve. To ensure a happy citizenry, do the following:
Satisfy the desires indicated at the city center.
Don't build production buildings (granaries, smelters, storehouses, fields, et cetera) or armories near civic buildings and dwellings. If you must, plant enough trees next to unhappy buildings to make their happiness indicators green.
Build many embellishments and plant lots of trees near buildings.
Unlike impressiveness, which changes slowly, your people’s happiness will fluctuate quickly according to their desires. They are a fickle bunch.
2.2.4.  Housing Capacity
You'll need room for lots of people, so it's best to get the most out of the dwellings you build. Each dwelling type has a base and maximum housing capacity. A villa’s capacity can only increase by one (to 10), a manor’s by two (to 12), and a mansion’s by 7 (to 14). To increase a dwelling's capacity, build other dwellings nearby. Be careful, though; villas house more when spread out, while mansions do their best close to other dwellings. You'll have to experiment to learn each dwelling type's preferred spacing. Packing dwellings too close together can cause unhappiness, but that can be remedied with embellishments and trees.
2.2.5.  Fertility
Fertility isn’t particularly important to this strategy, for two reasons: (1) your population will grow primarily through immigration, and (2) you’ll finish lands so quickly that villagers won’t have time to die from old age. Still, it’s a good idea to always have two or three male disciple breeders around just in case. Unless your housing capacity greatly outstrips your population, you’ll see few children. In fact, encouraging fertility by building nurseries can work against you when you're trying to build extra housing capacity for imminent immigrants.
2.3. Miracles
Playing this mostly defensive strategy, you can forego buying most of the miracles.
- Water you get for free in on the second Norse land, along with the altar.
- Heal is optional, as your villagers will rarely become injured.
- Shield protects city walls against catapults. Buy.
- Fire can be dropped on attacking enemy platoons. Buy.
- Electricity serves the same purpose as fire, hence isn’t needed.
- Meteor is good for attacking at a distance, hence unneeded.
The trickiest of the miracles to cast is the shield. If you throw or drop it, it generates a large blast of air. To create a shield, move to where you want the center of the shield to be, hold down the action button until a white circle appears on the ground, drag the circle to the desired size while keeping the action button pressed, and release the action button.
2.4. Wonders
Building wonders goes a long way toward converting enemy cities, so by all means buy and build them. However, while casting an epic miracle is neutral, any consequent destruction is evil. So don’t cast the destructive epic miracles (hurricane, earthquake, volcano).
The only epic miracle that helps a good god is the siren, but it’s a two-edged sword; it removes threats, but can easily cause homelessness. You’ll only need to cast it once, on land 9, but buy the siren wonder early (typically on land 5) for its impressiveness.
Tip: you can return to normal play immediately after casting an epic miracle by pressing the Esc button.
2.5. Your Creature
Your creature is your offense. However, you won’t need to use it much, so unless you’re being attacked keep it off the soldier leash. The burden of attack & defense will tilt your creature toward evil. To keep your oversized pal good, put it on the entertainer leash in free moments, buy the teddy bear and creature heal miracle, and teach your creature to heal villagers and water their crops.
2.5.1. Creature Roles
Forego buying the advanced creature roles. Your creature doesn't need them to accomplish its objectives, and the tribute is better spent on impressive buildings.
2.5.2. Creature Miracles
Your creature is your offense, so equip it with the tools required for success.
- Water is optional; it can help make your creature good.
- Heal is critical to your creature’s success in battle. Buy.
- Fire is essential for destroying enemy archers. Buy.
- Electricity helps your creature in close combat. It’s handy but optional.
2.6. Your People
Your people will take care of themselves after you set up resources for them. Create some disciple mineworkers and enough disciple refiners to staff production buildings, along with a few male disciple breeders. From the rest of your population, create a large number of disciple builders to help you increase your city’s impressiveness quickly.
2.7. Tribute
The sooner you gain tribute the sooner you can buy impressive buildings, so complete all of the bronze and silver scroll challenges.
For a quick impressiveness win you’ll need to build impressive buildings, so spend most of your tribute on buildings and wonders. You can forego creature roles, creature toys, books of lore, “bring forward” items (man, woman, best soldiers, best archers), and most of the miracles. In the next section, the “typical purchases” sections list what I bought during one game. These are only guidelines; if your creature is becoming evil, don’t hesitate to purchase the teddy bear or the Creature Heal miracle.
3. The Lands
The tutorial lands are straightforward: follow the consciences, and complete all the silver scroll challenges to earn maximum tribute.
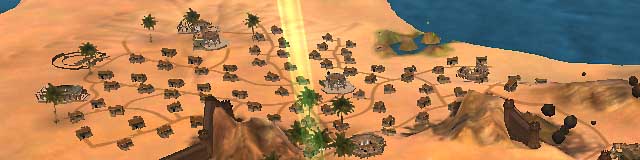
Note: throughout this section, I use compass directions when identifying features of the landscape. These directions refer to the iconic maps shown when loading the different lands, assuming North to be the top of the screen. That’s also roughly the direction of the enemy’s main city in each land.
3.1. Land 1 (game controls tutorial)
The bronze scroll challenges aren't exciting, but do them for the tribute.
3.2. Land 2 (a Greek tragedy)
People die! Volcanos erupt! Save a few people! Whoops, time to go. Sucks for those we didn't save, doesn't it?
3.3. Land 3 (tutorial, Norse)
Use this land to practice your forestry. When you first reach this land, grab any trees you can and redistribute them throughout your influence (all of which is fertile). Whenever your influence expands, grab a tree or three and replant them in unforested locations.
The tutorial forces you to take over a neighboring settlement. Once you do, you’ll find it giving you evil points. The cause is the settlement’s hovels and houses, which make the villagers unhappy. To make the settlement good, build enough villas to house everyone (five or six should do), then destroy the Norse abodes.
Keep an eye on your creature; teach it the right things to eat, and to be good to your people. No snacking on villagers!
3.3.1. Typical purchases
- Column (20,000)
- Lamp (10,000)
- Meadow (15,000)
- Pot market (20,000)
- Well (15,000)
3.3.2. Tips
In the Paternity Suit silver scroll challenge, it can be hard to keep track of the pregnant daughter. If you lose her, go do other things and then return to your city. When the daughter reaches her destination, a steady upward stream of little red hearts will mark her location.
Note that if you build on the site of the father’s house, the challenge will not appear.
3.4. Land 4 (Norse)

Begin this land by first ensuring that you’ll be rich in resources. Wood should be no problem once you get the hang of replanting, and the ore isn't a problem thanks to the bottomless mine near your town. For grain, buy the granary and then follow the grain strategy to ensure a healthy supply. I place the fields to the east of the town center (toward the shore), and leave the rest of the region near the shore undeveloped.
The strategy from this point on is build, defend, repeat. You’ll have plenty of people and resources, so build build build! Buy the manor and build many. The plateau west of the town center has location bonuses up to +200, so build many small buildings there. When building homes, reserve space between adjoining streets for a high impressiveness/happiness building like a tavern or baths.
The Norse opponent on this land isn’t aggressive at first, but will eventually send armies against you. These platoons won’t have catapults, so they’ll wait outside your main gate until you open it to welcome immigrants. Unfortunately, if you leave the gate open long enough for all the immigrants to enter, that can be long enough for a platoon to enter also. You can send your creature against them preemptively, or postpone attacking until they enter your influence. The former is evil, but more relaxed. The latter is more flustering—enemy soldiers in your city, sound the alarm!—but attacking attackers is not evil. The choice is yours.
When the consciences challenge you to build a wall to the east of your city, do so. Later, the Norse will send one platoon against it. Even though they’re stuck outside and can do no damage, if your influence ring extends outside the wall and they cross it the consciences will (annoyingly) sound the alarm. To end this pointless clamor, buy the Creature Fire miracle and leash your creature to the enemy platoon with the soldier leash. Even though your creature can’t reach the platoon, it will eventually wipe them out by tossing fireballs onto them.
3.4.1. Typical purchases
- Granary (30,000)
- Graveyard (30,000)
- Manor (40,000)
- Tavern (30,000)
- Plant market (24,000)
3.4.2. Tips
Throw the immortal guy (on the beach east of your city) in the steam vent for tribute. This takes some finesse; if he’s shot too far, the villagers won’t see him land and won’t award tribute. A good ride can net 35,000 tribute.
Unless you need the tribute, postpone the Nut Oil silver scroll challenge (throwing barrels) until you’ve taken the land. Then you can pick up barrels and place them on the targets. (The same is true for throwing challenges on later lands.)
The Undead Platoon silver scroll challenge only appears at night. Even if you’re good, complete it for the tribute. You can ignore the platoon afterward.
3.5. Land 5 (1st Japanese)
As always, begin the land by ensuring you’ll be well supplied with resources. Most of your territory is fertile, so you shouldn’t have a problem with wood or grain. To reach the mine, build a storehouse on the edge of your influence closest to it, then build a smelter even closer to the mine. By the time the mine's empty, emigrating towns should bring you enough to keep building.
The Japanese on this land won’t attack, so don’t waste ore building walls unless you plan to complete the “surround your city with walls” challenge.
Once you’ve established yourself on this land, there’s nothing to do except build. As usual, concentrate on impressiveness, so try for the maximum bonuses (always ![]() , and either
, and either ![]() or
or ![]() ) when you plunk down buildings.
) when you plunk down buildings.
You’re given a troop of archers, but since we’re a peaceful people there’s not much to do with them. Leave them near the center of your influence ring to prevent the enemy from casting a siren miracle on them. With the enemy’s siren wonder rendered impotent, there's no need to destroy it.
Complete the objectives and silver scroll challenges early to gain enough tribute to buy the siren wonder. By the time you can afford it you should have enough ore and wood to build two of them, so get building right away.
Your creature has little to do on this land, so why not put it on the entertainer leash for a while?
3.5.1. Typical purchases
- Smelter (60,000)
- Siren wonder (400,000)
- Hand forcing (20,000)
- Mansion (80,000)
- Statue market (28,000)
3.5.2. Tips
On the next land you’ll have to defend yourself early on, so save enough tribute to buy the Shield and Fire miracles (90,000 tribute total).
For the Lost Spy silver scroll challenge, keep all the arrows pointing away from the spy.
3.6. Land 6 (2nd Japanese)
Set up your resources the standard way. Place granaries & fields in the fertile region to the east of your town center. Build an altar west of your town center, and build a siren wonder nearby when it’s done. This will give you ample room to expand.
The enemy on this land will constantly send armies against your city. Build the north wall early, and keep your creature outside it to defend your city. You don’t need any other walls, as the villages to your west will emigrate early.
Once your walls are built, send your creature to knock down the three gates between you and the main enemy city. It might take more than one try due to the enemy archers, but keep at it. Your goal is to establish a clear path to the enemy hurricane wonder when it’s built later in the game. When the Japanese leader says something about the hurricane wonder, send your creature into his city and up to its town center. As soon as the wonder is done, have your creature destroy it.
While your creature is carrying out this task, it’s up to you to defend your city. Drop fireballs on attacking troops, and use the Shield miracle to protect your walls against catapults until your creature is free to destroy them.
Once the wonder is destroyed, divide your time between building and defense. The toughest challenge is finding good places to build. Once you fill the plateau you start on, you must search for areas that don’t give impressiveness penalties. Building a siren wonder or amphitheatre in the western end of the starting plateau will give access to a few areas without the penalty. In the western lowlands, build around the northern rim; in the eastern lowlands (near the Nut Oil silver scroll challenge), build houses against the bluff. Though difficult, it is possible to win this land without building a single building in unimpressive regions.
After this land is done, you will have purchased all of the essentials (except perhaps the Creature Lightning miracle). From here on, your buying can focus on impressive buildings & embellishments.
3.6.1. Typical purchases
- Amphitheatre (200,000)
- Rest home (40,000)
- Shield miracle (30,000)
- Creature Heal miracle (75,000)
3.6.2. Tips
For the Seven Samurai silver scroll challenge, set the time to night to make it easier to spot the statues. They’re scattered around the coastline and islands.
Sometimes the Sick Village silver scroll challenge ends quickly, while at other times it seems impossible to finish. In the latter case, go do something else and come back to it later. (Keeping the action button pressed for the duration of this challenge might help.)
Land 7 (3rd Japanese)
Set up resources as usual.
Militarily this land’s the hardest of all, with constant catapult and army attacks. Protect your city walls from catapult attacks with shield miracles, and destroy the catapults with your creature, fireballs, or rocks. The enemy creature is a pain; it tends to hang around just outside your influence, and will attack immigrants. If it kills all the immigrants in a group, their resources are lost. When immigrants near your city, send your creature out to battle the enemy creature. With luck, your creature will knock out the enemy creature and the immigrants will reach your city before it respawns. Alternatively, open your gates to lure the creature into your town, where you can drop rocks on it.
The enemy will construct an earthquake wonder which can do great damage to your city, so get your creature to knock it down as soon as it’s finished.
If you’re not paying close attention to defense, enemy troops can enter your city. If they do their ring-and-evaporate trick on your altar, it will deny you the miracles you need to defeat them. To avoid this, build a second altar far from the walls and toward the cliffs, and split your disciple worshippers between the two.
On this land you’ll have tribute to spare, so buy impressive buildings or save for a second wonder.
3.7.1. Typical purchases
- Hurricane wonder (600,000) [for its impressiveness]
3.7.2. Tips
You can solve the hidden sick herd challenge by using the heal miracle on the cows.
Wait to complete the Burning Wells silver scroll challenge until you’ve taken the land. Drop a water miracle on the first well, then use the M key to drop water bombs on each well in turn.
3.8. Land 8 (1st Aztec)
This land is atypical in two ways; the fertile region is very small, and the opponent is a cream puff. The latter makes for a very fast land. Concentrate on building (create a lot of disciple builders to help) and you can win this land in two hours flat.
The scarce resource on this land is wood, so make the most of it by buying the lumber mill. Remember that trees outside the fertile region still grow to maturity, they just don’t drop seedlings. So when the fertile area is thick with trees, grab a bunch and replant them on the edge of your city. Then you can grab one, squeeze a villa out of it, replant, and repeat a few minutes later.
You’ll need the squeeze-and-replant trick to house your population, which will grow very quickly through immigration. Partway through the land, hundreds of immigrants will arrive within a short period. Even with extra homes built in advance, you’ll likely still have to build villas like mad to house them all, but it’s worth doing to mitigate the homelessness penalty.
I was too busy fighting homelessness to plant trees
Some trees and about +2,000 impressiveness later
To prevent making a bad situation worse, don’t cast siren miracles on enemy troops.
Your opponent on this land is the easiest you’ll face. He’ll send a few armies or catapults your way at the beginning, but after you convert a few towns he’ll stop attacking. You can send your creature out to eliminate threats if you want, but it may not be necessary. In fact, this enemy is so passive that you needn’t bother to complete the walls around your city. The enemy troops will just sit around outside doing nothing. A neighboring town has a hurricane miracle, but they will emigrate before they can fire it.
You’ll have lots of tribute to play with, so buy the rest of the good embellishments and build them throughout your city. There’ll still be a lot of tribute left over, with which you can buy anything else you might like to have on the last land. Buy hand multipickup if you haven’t already; you’ll need it to quickly create many disciple worshippers on the last land.
3.8.1. Typical purchases
- Lumber mill (40,000)
- University (50,000)
- Baths (100,000)
- Hand multipickup (15,000)
- Creature Fire miracle (90,000)
3.8.2. Tips
The women on the Isle of Nymphs silver scroll challenge want a 21 year old man. To find one, press the S key while zoomed out to see villager statistics. If you have no men of the right age, look for one that’s younger. When you find one, turn off statistics, zoom in until the guy is highlighted, and turn statistics on again. This should turn on statistics just for this guy. Go about your business until he reaches 21, then take him to the isle. (If you have no males younger than 21, make some disciple breeders!)
If your creature’s on the evil side, this land is a good opportunity to rehabilitate it using the entertainer leash.
3.9. Land 9 (2nd Aztec)
The final land is different from the others; you start with an entire walled city, complete with resources and armies. This comes at a price: Aztec soldiers, catapults, and a creature will attack within minutes, and they will fire their volcano wonder soon after. It’s a real challenge to defend your city against this assault. However, there’s a reliable way to make the Aztecs total pacifists. When I use this strategy, the Aztecs never attack, and their creature doesn’t appear. I don’t know why; perhaps attacking the main Aztec city so soon throws off the Aztecs’ script. I won’t look this gift horse in the mouth.
Your goal: get your creature through the three gates guarding the main Aztec city as quickly as possible.
You’ll need to execute this strategy as soon as the land begins. Don’t waste time. The steps below should be accomplished without pause. They should take just a few minutes.
Open your city’s gate, put your creature on the soldier leash, and send it outside your city.
Close the city gate.
Leash your creature to the main Aztec city’s outer gate. Your creature will charge off to break it down.
While your creature is attacking the Aztecs' gates, god-build a siren wonder next to the creature pen.
Charging the wonder charged quickly is critical, so create at least a hundred disciple worshippers for it. Disband troops of archers if you don’t have enough worshippers.
Once your creature breaks down the first gate, send it to attack the second. Your creature won’t be able to get through the second gate on its own; the Aztec archers guarding it will kill your creature before it can seriously damage the gate. This is where the siren wonder comes into play.
You’ll have a breather while the siren wonder charges. During this period do several things simultaneously:
Send your creature to the enemy’s second gate. You’ll have time do this a few times before the wonder is charged. (This step may be unnecessary.)
Build a granary in the empty square by your city’s gate, surround it with lamps and fields, and make some disciple refiners and farmers. This will keep your storehouse stocked with grain.
Build a low-cost high-impressiveness building (e.g., a rest home) just inside the gate. This expands your influence enough to let you build a storehouse just outside the gate. With this in place, expansion to the plain north of your city is easy.
When the wonder has charged, cast the siren miracle as close to the enemy’s second gate as possible. You should be able to completely encompass the gate and most of the surrounding walls within the miracle’s radius. With the archers converted, send your creature to knock down the second gate. Once through it, destroying the poorly defended last gate will be easy. Finally, send your creature to damage the volcano wonder. One kick is enough to permanently disable it (though a fireball is more satisfying).
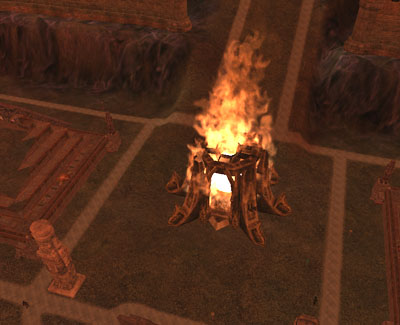
There’s nothing quite so cheery as a brightly burning enemy wonder
That’s it! By this point the Aztec troops will be quiescent—so tranquil, in fact, that they’ll kindly make room if you plop down a building blueprint where they’re standing. Now that’s mellow.
The rest of the land is just a matter of building like crazy. Keep the two building rule in mind, and build lots of housing. By the end of the land you’ll need to house over a thousand citizens, so plop down dozens of villa blueprints. With no need to cast additional siren miracles, take all the worshippers at the siren and convert them into builders. Just keep building. When your housing capacity exceeds both your population and that of your soon-to-be-converted enemies, return to your walled city and destroy the hovels, which make neighboring buildings unhappy. You can also destroy the armories, but remember that without armories, you can’t disband armies.
When the two smaller Aztec cities convert to your side, each will bring 20,000 ore. This will allow you to build multiple wonders, and all the civic buildings you need.
Partway through this land the Norse army will come to your aid. You won’t need them, so ignore them unless you want even more builders. Of course, if you disband them you’ll have to create more housing.
With constant building, you should be able to win the land in an hour and a half. Congratulations, god.
3.9.1. Typical purchases
- Heal miracle (20,000)
- Nursery (40,000)
- Creature Advanced Soldier (50,000)
- Creature Master Soldier (250,000)
3.9.2. Tips
After you’ve finished the land, clicking the gold scroll brings up the credits. Watch them or, if you’re impatient, skip to the end by pressing Esc. It’s worth it.
Afterword
Where shall I go from here? The Battle of the Gods expansion, or return to the original Black & White to try once again to finish Creature Isle?
Last updated 21 October 2006
http://www.rdrop.com/~half/General/GameTips/bw2.strategy.html
All contents ©2006 Mark L. Irons